Unified District Information System for Education Plus (UDISE+) is one of the most extensive Management Information Systems initiated by the Department of School Education and Literacy, Ministry of Education, covering more than 14.89 lakh schools, 95 lakh teachers and 26.5 crores of children.
It is time-consuming to update student data through data entry in the UDISE Web portal. Thankfully, a bulk update module in UDISE allows users to upload the details of all students using an Excel file. This is one of the recommended ways to upload student data, especially for those schools where the number of students is large.
Note: Please make sure the data of all the students is uploaded in a single Excel sheet.
School is allowed to upload Excel only once. Bulk uploading is available only for Uploading Plus One and Plus Two Students data.
The steps involved are given below:
Step 1: Obtain Student Details from HSCAP Admin Login.
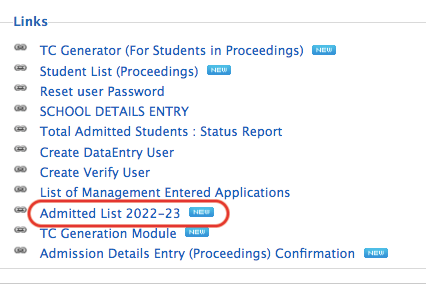
Student lists of Plus One and Plus Two will be available in the link “Admitted List 2022-23”. Open that link and all data of plus one and two need to be copied into an Excel sheet as mentioned in step 2
Step 2: UDISE Data Converter Google Sheet
Special thanks to Abdul Asees sir for creating this Google sheet and making it available for all of us. After opening the Google Sheet, make a copy of it so that we can make use of it.

After making the copy, please notice that the Google Sheet file has three sheets underneath as shown in the screenshot below.

Copy student details of Plus One Students from HSCAP( as mentioned in Step 1) to the first sheet named: Paste +1 data from HSCAP. Similarly, Copy student details of Plus Two Students from HSCAP( as mentioned in Step 1) to the second sheet named: Paste +2 data from HSCAP. After that, go to the third sheet (named Data for UDISE). Copy the combined student details excluding the header details. This copied data has to be pasted to a UDISE Template Excel as mentioned in the next step.
Step 3: Downloading the UDISE Excel Template File( SDMS Excel)
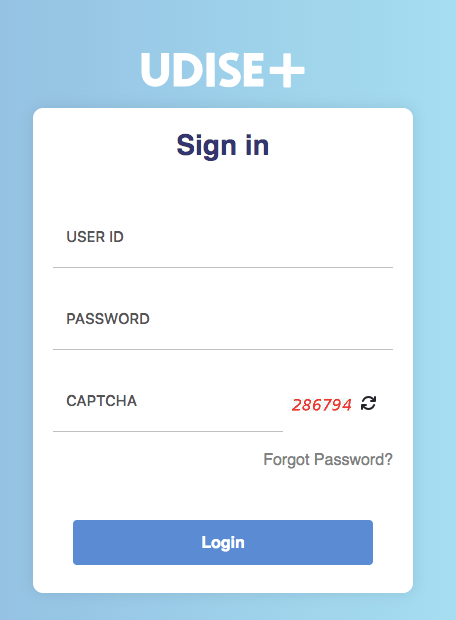
It’s time to visit the UDISE Website to download the UDISE Excel Template File( SDMS Excel). The direct login link is given here
UDISE Direct Login Link.
After logging in click on the Upload Data Via Excel 2022-23 link on the left side of the page as shown below. On the opening page, click on the icon “Download Blank Excel Template for uploading”.

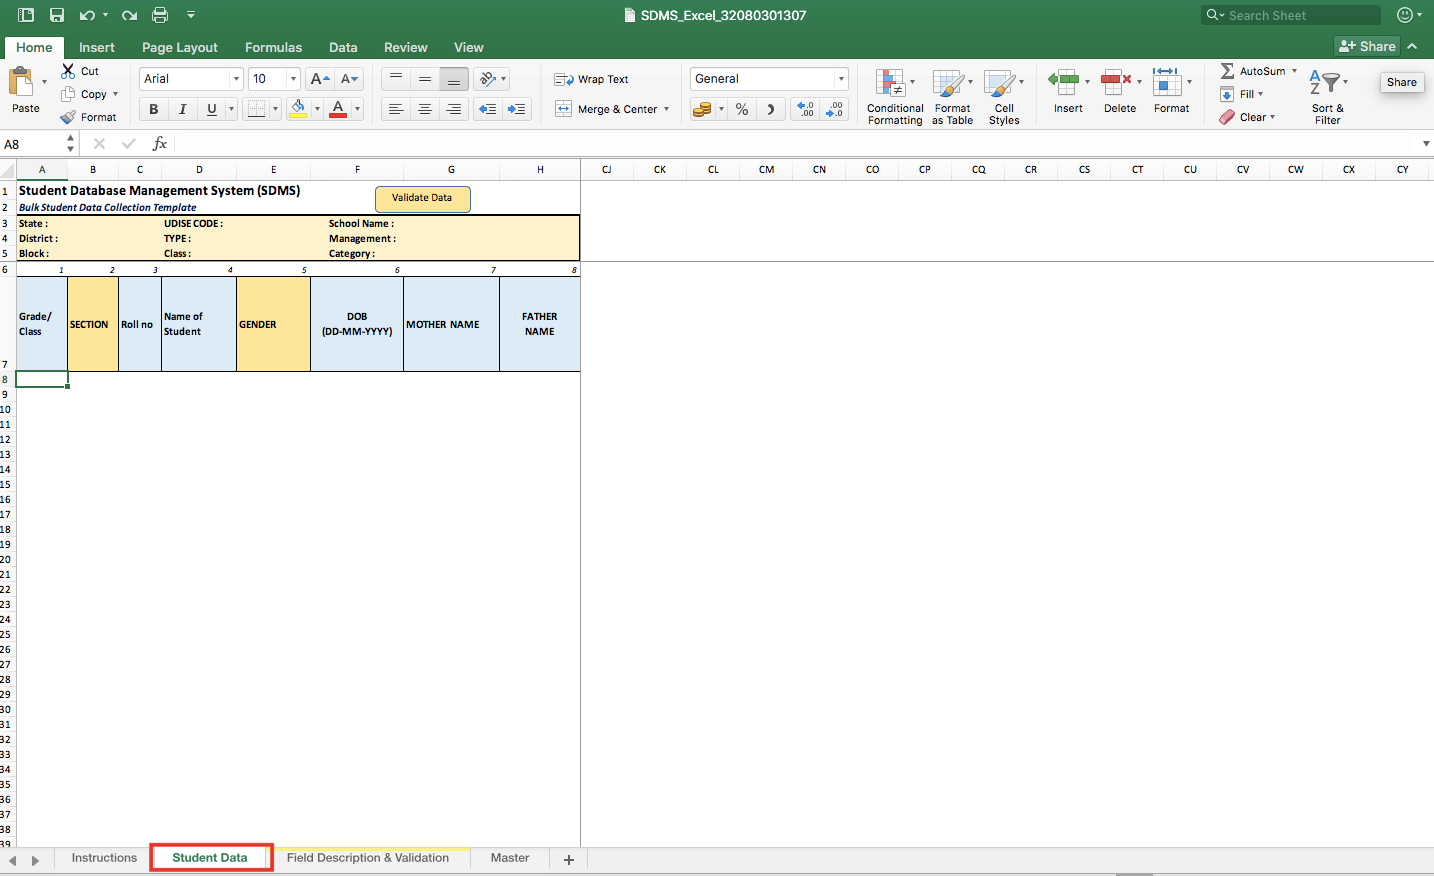
Open the downloaded Excel Sheet (Named: SDMS Excel). There will be 4 sheets in the Excel file. Select the Second one named “Student Data”. Paste the student data copied as in step 2 and save the file. If you go through the Excel file, you will notice that some fields are still missing: The Aadhaar number of the student, Name as in Aadhaar number, Phone number of the Parent/Student. There are some data that are mandatory. We will update the mandatory fields in the Excel sheet in the next step.
Step 4: Updating the UDISE Excel File( SDMS Excel)
As mentioned in the above step, some of the fields in the SDMS file are missing. There are some fields that are mandatory and we need to fill them before uploading them to the UDISE website.
The Mandatory Fields are:
- Section
- Aadhaar No of Child
- “STUDENT NAME AS PER AADHAR”
- MOTHER TONGUE
- MOBILE Number (of Student/ Parent/ Guardian)
- ADMISSION DATE
- MARKS % OF PREVIOUS EXAM
- PREVIOUS ACADEMIC YEAR SCHOOLING STATUS
To obtain the above details, the admission file needs to be referred to. Moreover, some of the fields are number encoded. For example, if the Mother tongue is Malayalam, the code is 98. Please refer to the Validation Sheet before updating the Excel sheet. Take utmost care and go through the SDMS file thoroughly. The Validation Sheet must also be referred to check the accuracy of the data in the SDMS file.
Note: On the UDISE website, sections must be created for each course for Plus One and Plus Two. The section name must also be updated in the SDMS file. For more information on Section creation, please check the HSS Reporter Website
Step 5: Uploading the updated SDMS File to the UDISE Website
After updating the SDMS file in step 4, save the file log in to the UDISE website and go to the “Update Data Via Excel file” page. Click on the Browse for file option as shown below and upload the SDMS file. There will be Click here to upload the file underneath it. Click it to upload the data.

There will be a Click here to upload the file underneath it. Click it to upload the data as shown in the image below.

Read the General Instructions carefully before proceeding.

The following message will be shown next

Press ok and click Excel status as shown below.

If there are errors in the uploaded data, we will get the following screen.

You can use the ” Check Erroneous Data” option to check for errors. You can view the errors using the View option under ” Check Erroneous Data”. Download the validated Excel sheet using the process button. That file will indicate the errors in yellow colour. Corrections can be made to that file and the same file can be uploaded again for validation using the “upload new template” as shown in the figure above. Repeat these steps until there are no errors.
If there are no errors proceed to final upload as shown in the image below. Please note that Updating UDISE data through Excel can be done only once per school.

Step 6: Verifying the Uploaded Data
If all the steps are followed correctly, just like magic, all student data will appear in the corresponding section. We still need to verify each student to make sure there are no mistakes. Scholarship details also have to be updated in this step. There are options to verify all student data with one click. However, it is advised to review each student’s profile and, if necessary, make any corrections.
Hopefully, this article has been helpful in updating student details in UDSIE.
Article Prepared by
Shebin S
HSST Computer Application
HSS Wing
Panangad VHSS


